Go at your own pace · Optional organization · No audio needed
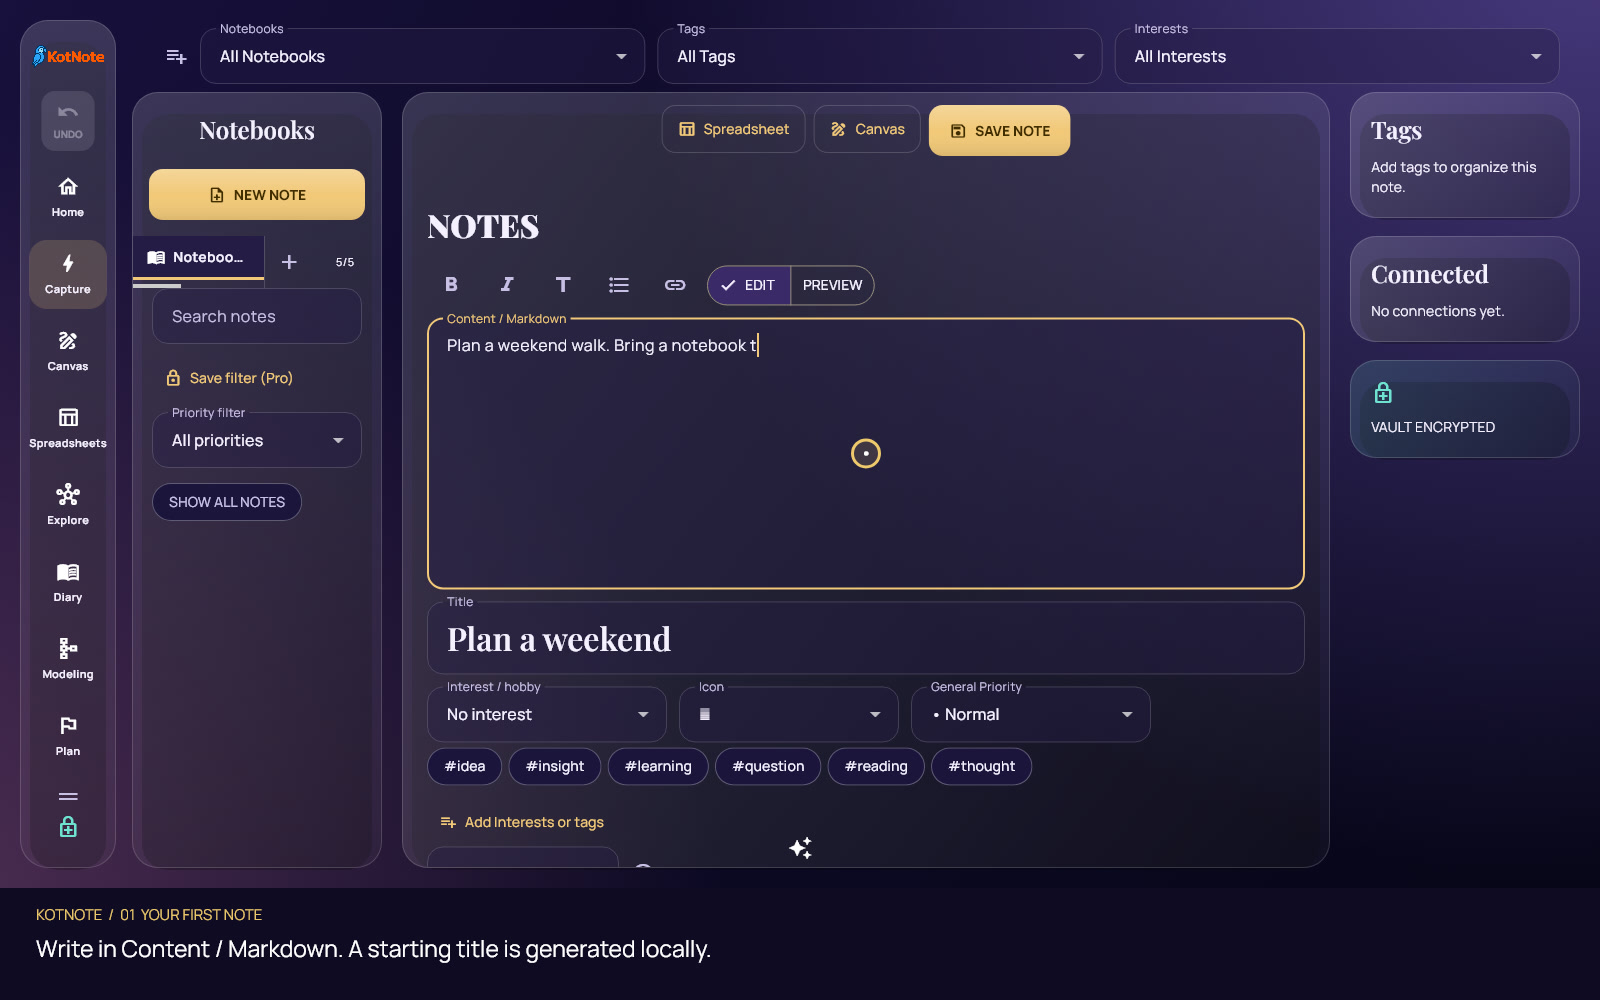
Actual KotNote interface, fictional example data.
STEP 01
Open your workspace
You only need one thought to begin.
Open KotNote in your browser and sign in. If you are new, choose Register and complete the email activation before signing in.
Open Capture / Notes from the navigation. On a phone, open the navigation menu first.
Choose New note. You can leave tags, Interest and the other optional fields alone for now.
STEP 02
Write and save your first note
Try this: “Plan a weekend walk. Bring a notebook to sketch ideas.”
Write in Content / Markdown. Plain text works; formatting is optional.
KotNote derives a starting title from the first three words. Click Title to replace it with “Weekend walk”. Summary and Description can be edited too.
Choose Save note. Look for the saved item in the notebook list. You can return to it and edit the same note later.
STEP 03
Add just enough organization
A notebook is a collection. An Interest is a topic. Tags are flexible labels.
Fresh accounts start with a small set of enabled choices—up to six tags and three Interests. Click a suggested tag to assign it to this note, or choose a topic in Interest/hobby.
Need something else? Choose Add Interests or tags, search the catalog, enable what you want, and save your choices. Then select the new tag or Interest on the note. Enabling a choice does not assign it to every note.
Show more tags and Show all enabled Interests expand longer lists. Create tag stays available for your own label. Advanced profile sources are under More… → Tags and interests from.
Save the note after changing its assignments. To reduce your enabled list later, open Settings → Add or disable Interests and tags. Disabling a choice preserves its assignments on existing notes.
STEP 04
Find it and make a change
Practice reopening the note you just saved.
In Notes, choose Show all notes if you want to search across notebooks. Type “Weekend” into Search notes.
Double-click the result to open its details, then choose Edit. Change the title or content, then choose Save note. This updates the original item.
If a result is missing, clear the search and check the shared Notebook, Tag and Interest filters. Active filters combine; choosing All Notebooks does not clear the others.
Explore shows the same saved information in other views. A single click selects a node; double-clicking opens it and updates its read/last-accessed state.
STEP 05
Choose one next step
There is no need to learn every workspace at once.
For a daily journal, open Diary, select a calendar day, and use Add note or the empty-day composer. The new note uses that selected day.
For a visual idea, try Canvas with text, drawing or images. For a small structured list, try Spreadsheets.
Return to the complete feature guide when you need connections, imports, planning or Modeling. Optional AI actions are separate from simply writing and saving a note.
WATCH, THEN TRY
Three short walkthroughs.
Follow the English interface with English or Finnish subtitles. These silent videos have on-screen instructions; pause, seek or use full screen whenever you need.